Cheap Kitchen Floor Makeovers

This Is What a $100 Kitchen Makeover Looks Like Rental kitchen makeover, Rental kitchen, Cheap

Diy Kitchen Makeover Before And After : The Kitchen, in all its glory Small kitchen

Before & After: An Unbelievably Chic Rental Kitchen Makeover Rental kitchen makeover, Rental

Kitchen Tile Makeover! – Sarah Joy

20+ Discount Kitchen Cabinets Jacksonville Fl – Kitchen Floor Vinyl Ideas Check more at http

Modern Kitchen Makeover – Before and After Modern kitchen, Kitchen makeover, Floor makeover

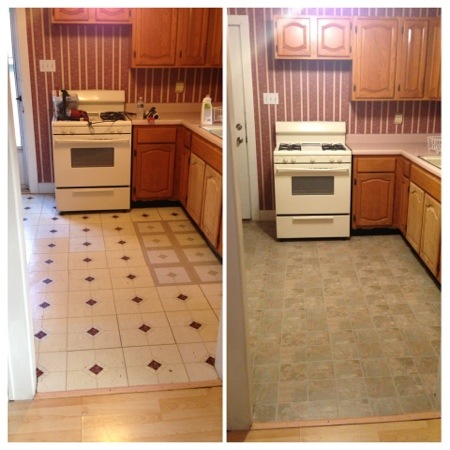
Fabulous Kitchen Floor Makeover Modern farmhouse, Floor makeover, Kitchen flooring

how win free kitchen makeover landscape unnamed file bhg sweepstakes bathroom remodel makeov

Kitchen Floor Makeover – Before and After – Live Life Active Fitness Blog
7 Cheap Flooring Ideas
:max_bytes(150000):strip_icc()/8---St-56a2fc745f9b58b7d0cffd66.jpg)
Mummy Hearts Money: A Cheap Kitchen Makeover Cheap kitchen makeover, Kitchen remodel layout

Related Posts:
- Small Kitchen Floor Plan Ideas
- Laminate Flooring In Kitchen
- Black Slate Tile Kitchen Floor
- How To Lay Tile In Kitchen Floor
- Red Kitchen Floor
- Cheap Kitchen Laminate Flooring
- Decorative Kitchen Floor Mats
- Contemporary Kitchen Flooring Ideas
- Kitchen Ceramic Tile Floor
- Quarry Tile Kitchen Floor
Are you looking for an affordable way to spruce up your kitchen floor? Kitchen floor makeovers don’t have to cost a fortune. In fact, there are several easy and inexpensive ways to improve your kitchen floor without breaking the bank. From DIY tile overlays to stylish, low-cost floor materials, these four kitchen floor makeover ideas can help you transform the look of your home in no time.
### 1. Paint It Up
One of the simplest and most cost-effective ways to make over your kitchen floor is to paint it. Whether you choose to go with a neutral color or opt for a fun pattern, painting your kitchen floor is an easy way to instantly add color and personality to the room. Painting your kitchen floor is also an ideal way to hide any old, stained tiles or outdated materials.
To get started, clean the surface of the floor thoroughly and lightly sand any areas that need improvement. Next, apply a coat of primer and let it dry completely before beginning the painting process. As you paint, avoid creating puddles and drips by using brush strokes in the same direction, and be sure to let each coat dry completely before adding another. Once your entire floor is painted, apply two coats of polyurethane for durability.
### 2. Overlay With Tile
Another budget-friendly way to makeover your kitchen floor is to overlay it with tile. Installing tiles over existing floors gives your space a new and stylish look while also protecting your existing floor from damage. You can find peel-and-stick tiles at most hardware stores in a variety of colors and designs; they’re also easy for DIYers of all skill levels to install. When selecting your tiles, choose ones with adhesive backing so that you don’t need to apply mortar as part of the installation process.
Before starting installation, clean the surface thoroughly, and if necessary, use a leveling compound on uneven surfaces. Make sure the surface is completely dry before applying the adhesive side of the tiles and pressing them firmly into place. If necessary, cut tiles around obstacles such as faucets or doorways using a sharp utility knife or wet saw. Finally, grout the tiles once they have been laid down for a seamless finish.
### 3. Go Modern With Vinyl
Vinyl flooring has become increasingly popular in recent years due to its durability and affordability. It’s available in a range of styles that mimic natural materials such as wood or stone, making it ideal for modern kitchen designs. In addition, vinyl is water-resistant and easy to clean; this makes it perfect for busy kitchens where spills are common occurrences.
When installing vinyl flooring in your kitchen space, start by cleaning and repairing any existing damage on the surface before laying down a plastic sheeting or underlayment. To prevent water from seeping through to the subfloor, make sure that all cracks between boards are filled with silicone or some other type of waterproof sealant. Once everything is ready to go, apply adhesive vinyl planks or sheets according to manufacturer directions and finish off with grout or assembly kits as needed for a seamless look.
### 4. Refresh With Laminate Flooring
Laminate flooring is another smart choice for budget-friendly kitchen makeovers due to its durability and versatility. Like vinyl, laminate comes in an array of colors and styles that mimic natural materials such as wood planks or stone tiles — allowing you create anything from a traditional kitchen design to a modern one without breaking your budget.
When working with laminate in your kitchen space, start by filling any holes or cracks in the subfloor using concrete patching compound before laying down a moisture barrier liner along with foam padding for cushioned comfort (if desired). Make sure that everything is even before installing laminate boards following manufacturer’s instructions; then use adhesive strips along the edges for additional stability and protection against moisture damage. Once all boards have been laid down properly, attach matching moldings along edges for a finishing touch that will give your new kitchen floor a polished look.
With these four easy ideas for cheap kitchen floor makeovers, you don’t have to spend an arm and a leg just to get beautiful results. Whether you decide on painting it with bold colors or refreshing it with modern lam Inate, there’s a budget-friendly solution out there for you.
What are some budget-friendly DIY kitchen floor makeover ideas?
1. Paint your kitchen floor: Depending on the type of flooring you have, you can easily paint it for a budget-friendly transformation. Be sure to use a primer first, then a durable, washable floor paint.2. Tile-Effect Vinyl Flooring: Perfect for those who live in rental properties or just looking for a simple and affordable makeover, tile-effect vinyl is easy to install and comes in a variety of colours and patterns.
3. Peel & Stick Tiles: Another great budget-friendly option, peel and stick tiles are a perfect DIY solution that can be installed in a few hours. Plus, peel and stick tiles come in a range of shapes and sizes, so you can get creative with your design.
4. Stain your concrete floors: If your kitchen has concrete floors, you can easily give them a new look by applying stain or sealer. With the right sealer, you’ll be able to keep your floor looking fresh for years to come.
5. Lay area rugs: For an extra pop of color and warmth, try laying area rugs over your existing kitchen floor. Not only do area rugs come in various sizes and styles, but they’re also inexpensive and easy to maintain.
What materials are needed for a DIY kitchen floor makeover?
1. Self-leveling floor compound2. Roller and/or brush for levelling product
3. Floor primer
4. Nylon roller for priming
5. Paint roller and pan for applying paint or floor finish
6. Decorative tape and/or stencils
7. Paint or polyurethane floor finish
8. Paintbrush or sponge applicator for decorative details
9. Sandpaper and steel wool (as needed)
10. Drop cloths or plastic sheeting to protect surrounding areas
11. Vacuum cleaner and mop (for cleaning up)
12. Appropriate materials for the desired flooring (tile, carpet, cork, vinyl, laminate, etc.)
What tools do I need for a DIY kitchen floor makeover?
1. Tape measure2. Pencil
3. Floor preparation tools (sander, buffing machine, etc)
4. Floor adhesive
5. Tile saw or jigsaw
6. Grout
7. Sponge
8. Leveler
9. Caulk gun
10. Finishing tools (edge trimmer, paint brush, sealer, etc)
11. Power drill (for installing moldings and sealant)
12. Bucket And sponge for cleaning up
What are the steps for a DIY kitchen floor makeover?
1. Remove old flooring: Start by carefully lifting and removing the old flooring. If it’s vinyl, use a heat gun to help ease the removal process. If it’s tile, use a chisel and hammer to break it up.2. Prepare the surface: Once you have the old flooring completely removed, make sure to sweep, vacuum and mop the area to get rid of all dust and debris. If needed, you can also use an adhesive remover before installing the new flooring.
3. Install new flooring: Depending on what type of flooring you chose, you can either do it yourself or hire a professional. If you’re installing tile, make sure to lay out your pattern before starting. For hardwood, be sure to measure and pre-drill holes for any transitions or door jambs that may be present before nailing them down.
4. Seal your floor: After the floor is installed, seal it with a waterproof sealant to prevent any moisture damage or staining. Allow it to dry completely before walking on it or adding furniture or appliances back into the kitchen.