A Step-by-Step Guide to Laying Tile in Your Kitchen Floor
Laying tile in your kitchen floor can completely transform the look and feel of the space, making it more modern, durable, and easy to clean. While the process can seem daunting, with careful planning and execution, you can achieve professional results. This guide will walk you through the key steps of laying tile in your kitchen floor, from preparation to maintenance.
Planning and Preparation
- Assessing the Subfloor: Before you begin, it’s essential to assess the condition of your subfloor. The subfloor should be clean, level, and sturdy enough to support the tile. Any imperfections or damage should be repaired before laying the tile to ensure a smooth and durable finish.
- Gathering Materials and Tools: Make a list of all the materials and tools you’ll need for the project. This includes tiles, adhesive, grout, spacers, a notched trowel, a tile cutter, a level, a measuring tape, and a sponge. Having everything on hand before you start will make the process more efficient.
- Measuring and Planning the Layout: Measure the dimensions of your kitchen floor to calculate the number of tiles needed. Plan the layout by starting from the center of the room and working your way outwards. This will help create a balanced and symmetrical design. Use chalk lines to mark reference points on the floor.
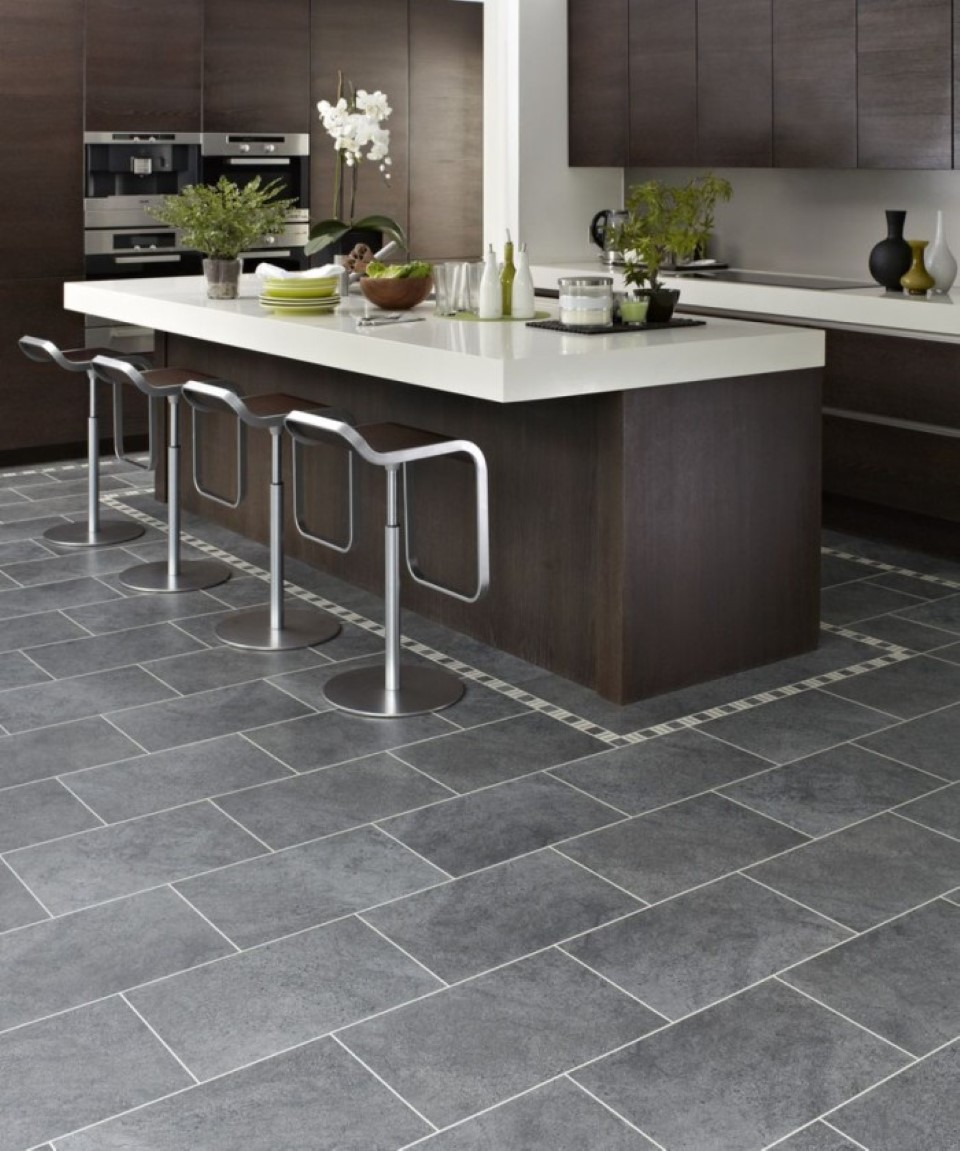
- Choosing the Right Tile: Select tiles that are suitable for kitchen floors. Porcelain and ceramic tiles are popular choices due to their durability and resistance to moisture. Consider the size, color, and pattern of the tiles to ensure they complement your kitchen’s overall design.
- Preparing the Subfloor: Clean the subfloor thoroughly to remove any dust, debris, or grease. If necessary, use a leveling compound to smooth out any uneven areas. Allow the subfloor to dry completely before proceeding with the tile installation.

Laying the Tile
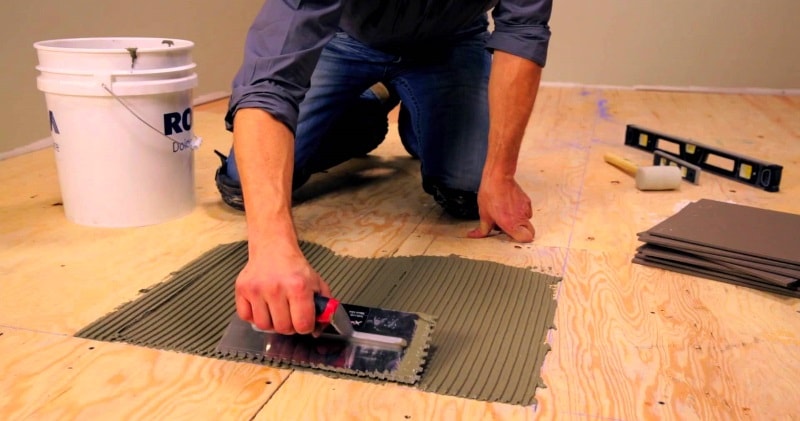
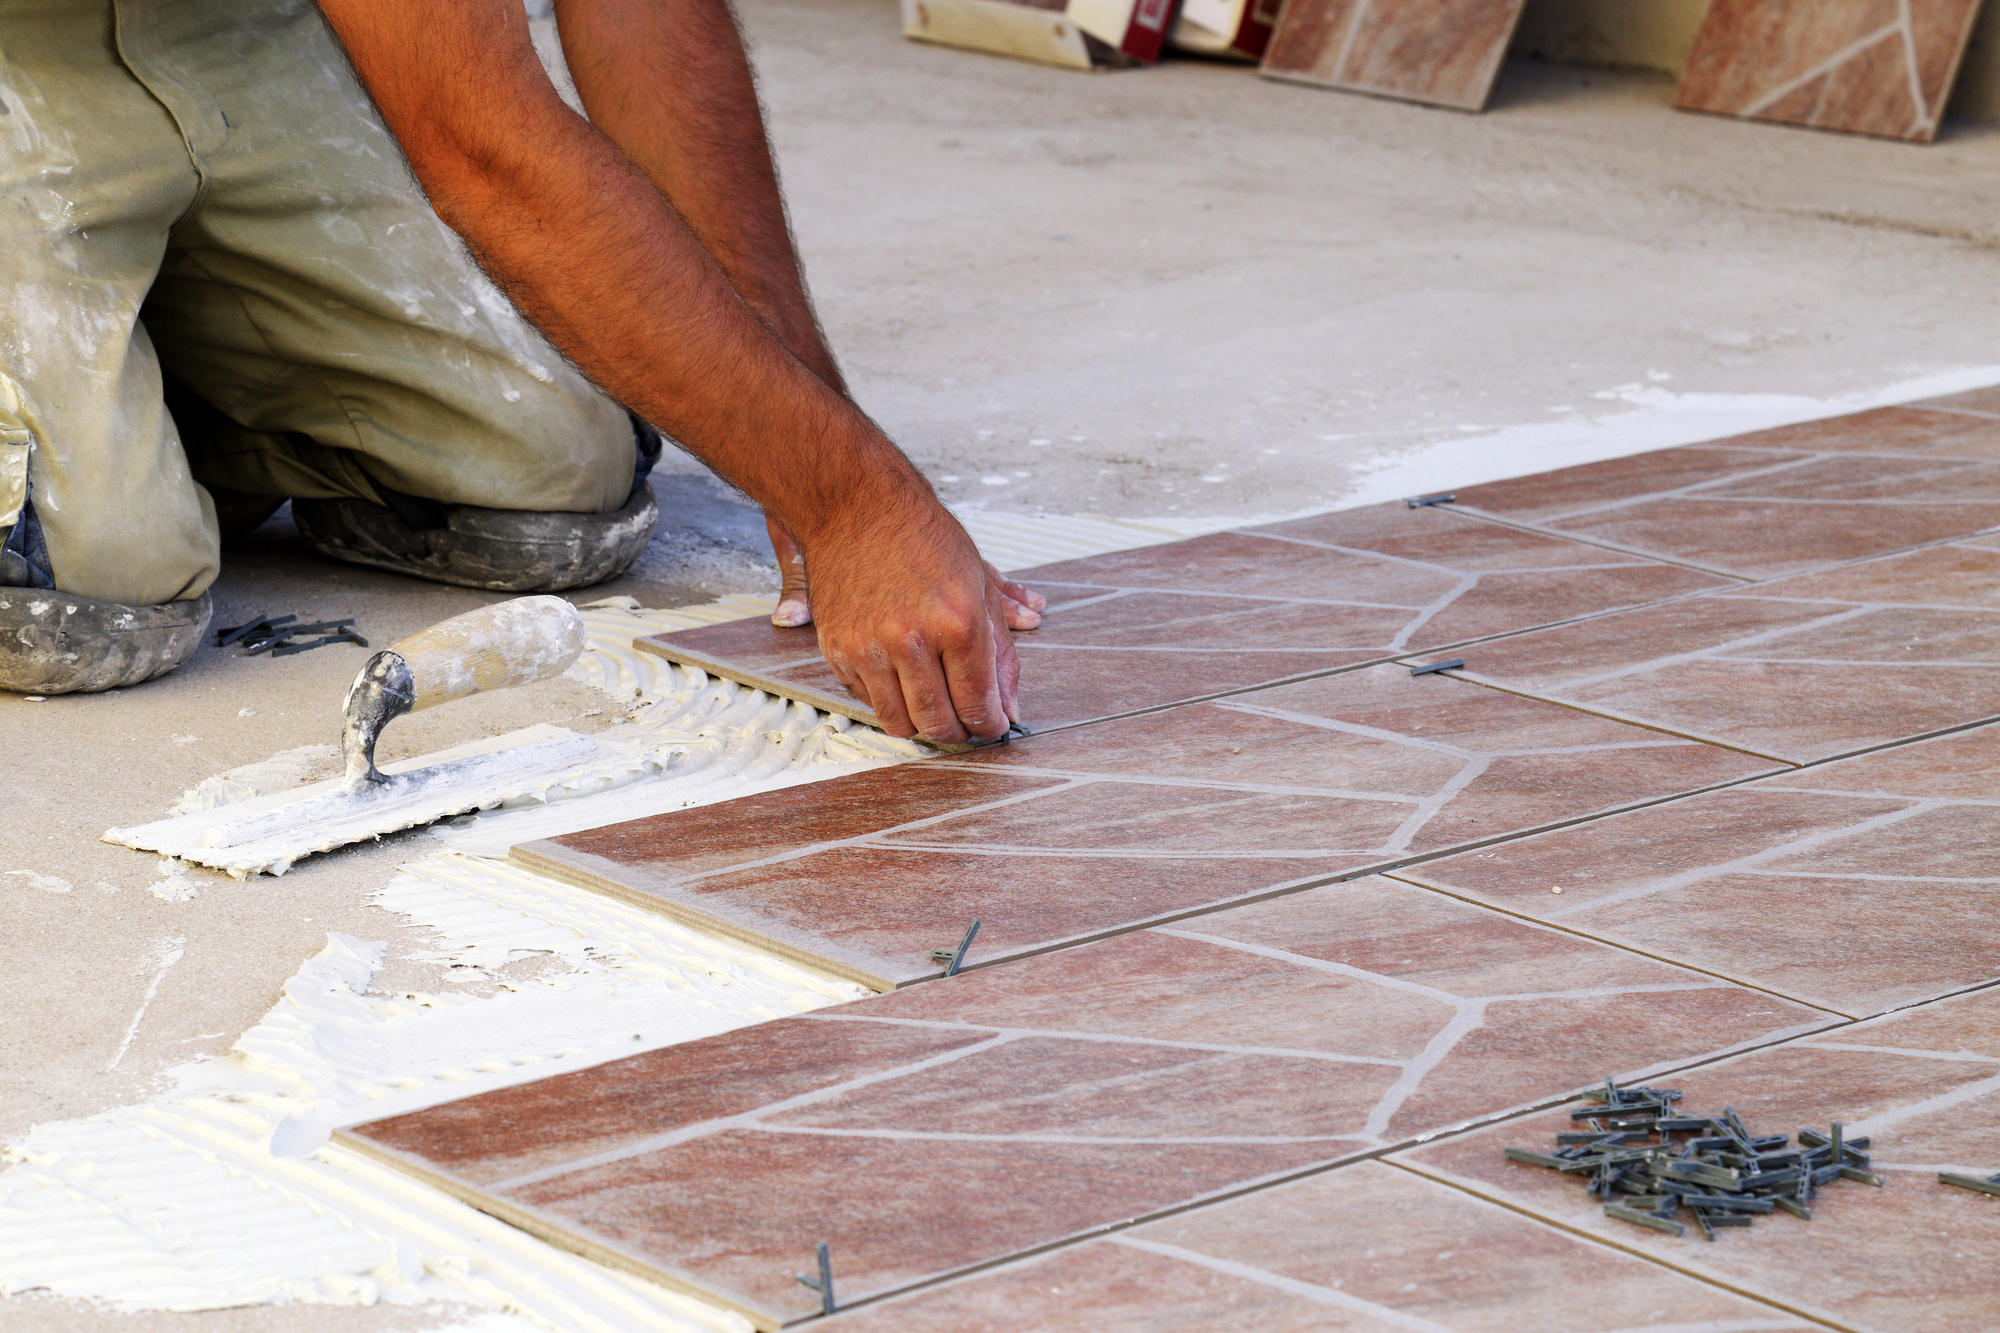
Applying Adhesive: Start by applying a thin layer of adhesive to a small section of the subfloor using a notched trowel. Spread the adhesive evenly, making sure to cover only a small area at a time to prevent it from drying out before you can lay the tiles.
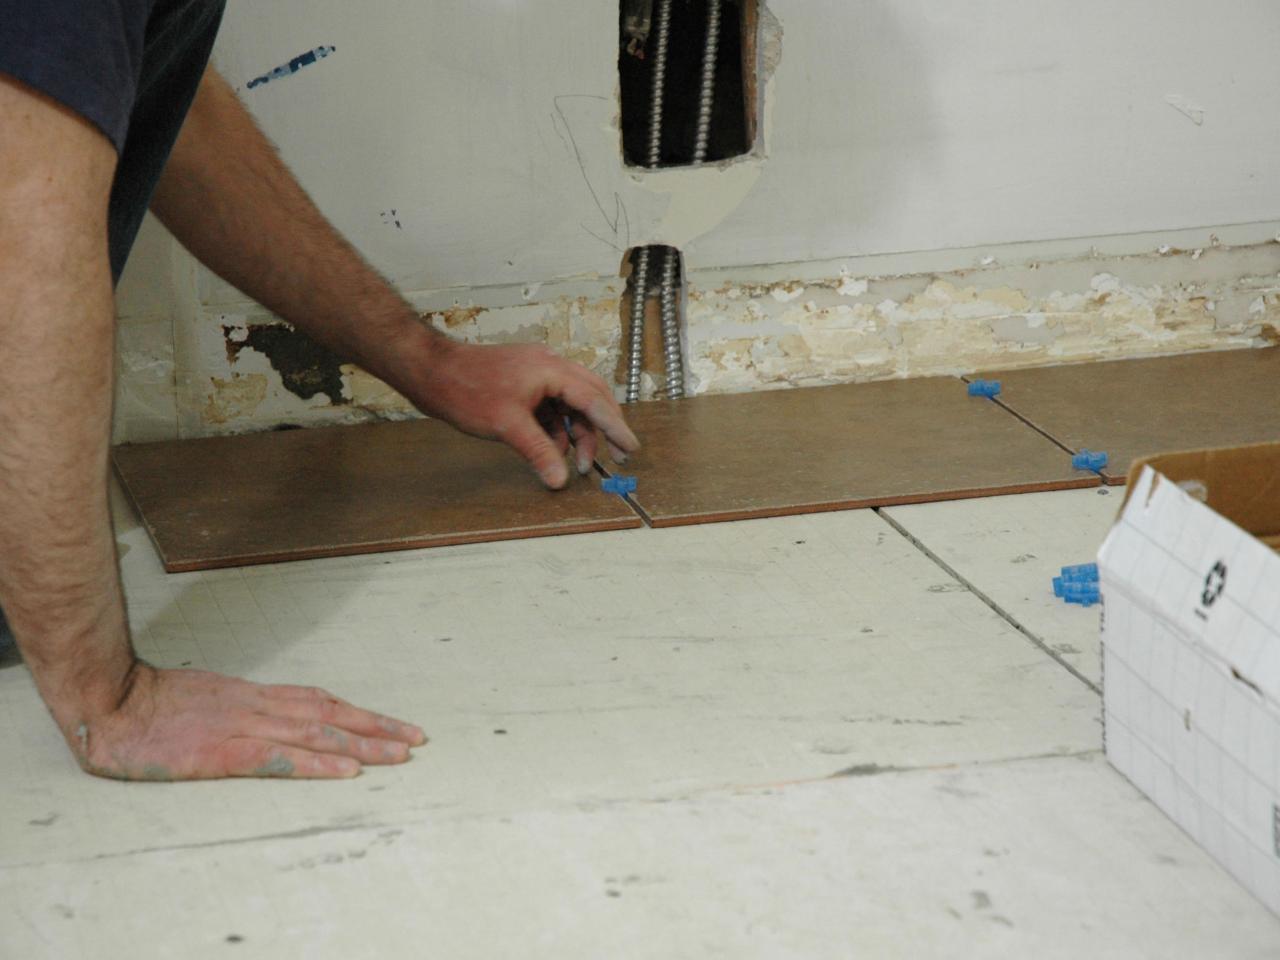
Setting the Tiles: Begin laying the tiles from the center of the room, following the reference lines you marked earlier. Press each tile firmly into the adhesive, ensuring it is level with the surrounding tiles. Use tile spacers to maintain consistent gaps between the tiles for grout.
Cutting Tiles to Fit: As you approach the edges of the room, you’ll need to cut tiles to fit. Use a tile cutter or a wet saw to make precise cuts. Measure the space carefully before cutting to avoid mistakes. Always wear safety goggles and gloves when cutting tiles.
Ensuring Proper Alignment: Continuously check the alignment of the tiles as you work. Use a level to ensure the tiles are even and adjust as necessary. Make small adjustments to the tiles while the adhesive is still wet to achieve a perfect fit.
Allowing the Adhesive to Set: Once all the tiles are laid, allow the adhesive to set for at least 24 hours. Avoid walking on the newly tiled floor during this time to prevent shifting or uneven settling.

Grouting the Tiles
Mixing the Grout: Prepare the grout according to the manufacturer’s instructions. Mix the grout thoroughly until it reaches a smooth, consistent texture. Only mix as much grout as you can apply within a short period, as it can harden quickly.
Applying the Grout: Use a rubber float to spread the grout over the tiles, pressing it into the gaps between the tiles. Work in small sections to ensure even coverage. Hold the float at a 45-degree angle to the tiles and apply firm pressure to fill the gaps completely.
Removing Excess Grout: Once the gaps are filled, use the float to scrape off any excess grout from the surface of the tiles. Be careful not to remove grout from the gaps. Let the grout sit for about 10-15 minutes, then use a damp sponge to wipe away any remaining grout haze from the tiles.
Smoothing the Grout Lines: After the grout has had time to set slightly, use a damp finger or a grout finishing tool to smooth the grout lines. This will create a neat and professional finish. Allow the grout to cure for the recommended time, usually 24-48 hours.
Cleaning the Tiles: Once the grout has cured, clean the tiles thoroughly with a damp sponge or cloth to remove any remaining grout residue. Avoid using excessive water, as it can weaken the grout. Buff the tiles with a dry cloth to bring out their shine.
Sealing the Grout
Choosing the Right Sealer: Select a grout sealer that is suitable for kitchen floors. Sealing the grout will help protect it from moisture, stains, and mold. There are various types of sealers available, including penetrating sealers and membrane-forming sealers.
Applying the Sealer: Apply the sealer to the grout lines using a small brush or applicator. Be careful to avoid getting sealer on the tile surface. Follow the manufacturer’s instructions for the application process and allow the sealer to dry completely.
Maintaining the Sealer: Over time, the grout sealer may wear off and need to be reapplied. Regularly inspect the grout lines for signs of wear and reseal as needed to maintain their protection. This will help extend the life of your grout and keep it looking clean and fresh.
Avoiding Stains and Damage: To prevent stains and damage, clean up spills promptly and avoid using harsh chemicals on the grout. Use a pH-neutral cleaner to keep the grout and tiles in good condition. Regular cleaning will help preserve the appearance of your tiled kitchen floor.
Long-Term Care: Proper maintenance is key to the longevity of your tiled kitchen floor. Sweep or vacuum the floor regularly to remove dirt and debris that can scratch the tiles. Mop the floor with a damp mop and mild cleaner to keep it looking pristine.

Tips for a Successful Tile Installation
Taking Your Time: Rushing the tile installation process can lead to mistakes and an uneven finish. Take your time with each step, from planning and preparation to laying the tiles and grouting. Patience and attention to detail will result in a professional-looking floor.
Using High-Quality Materials: Invest in high-quality tiles, adhesive, and grout to ensure the durability and longevity of your kitchen floor. While it may be tempting to cut costs, using subpar materials can lead to problems down the line.
Seeking Professional Help: If you’re unsure about any aspect of the tile installation process, don’t hesitate to seek professional help. An experienced tile installer can provide valuable advice and ensure the job is done correctly.
Keeping Safety in Mind: Wear protective gear, such as gloves, safety goggles, and knee pads, throughout the tile installation process. Handling tiles, adhesives, and cutting tools can pose risks, so it’s important to prioritize safety.
Enjoying the Results: Once your new tiled kitchen floor is complete, take the time to appreciate the results of your hard work. A beautifully tiled floor can enhance the overall aesthetic of your kitchen and provide a durable, easy-to-maintain surface for years to come.

Tile Floor Kitchen on Pinterest Faucets, Faucet repair and Tiled floors

How To Lay Floor Tiles – DIY Floor Tile Installation
Tiling the Kitchen Floor PlanItDIY How to lay tile, Diy kitchen flooring, Diy kitchen renovation

How to Install Ceramic Floor Tile
/LayingCeramicFloorTile-5b75cedc46e0fb00507045bd.jpg)
10 Most Common Mistakes When Laying Floor Tiles (And How to Avoid Them)
Pros and cons of tile kitchen floor HireRush Blog
Leaving our mark on our new kitchen floor! Laying Tile Under Appliances Ask Me Studio Blog

Related Posts: