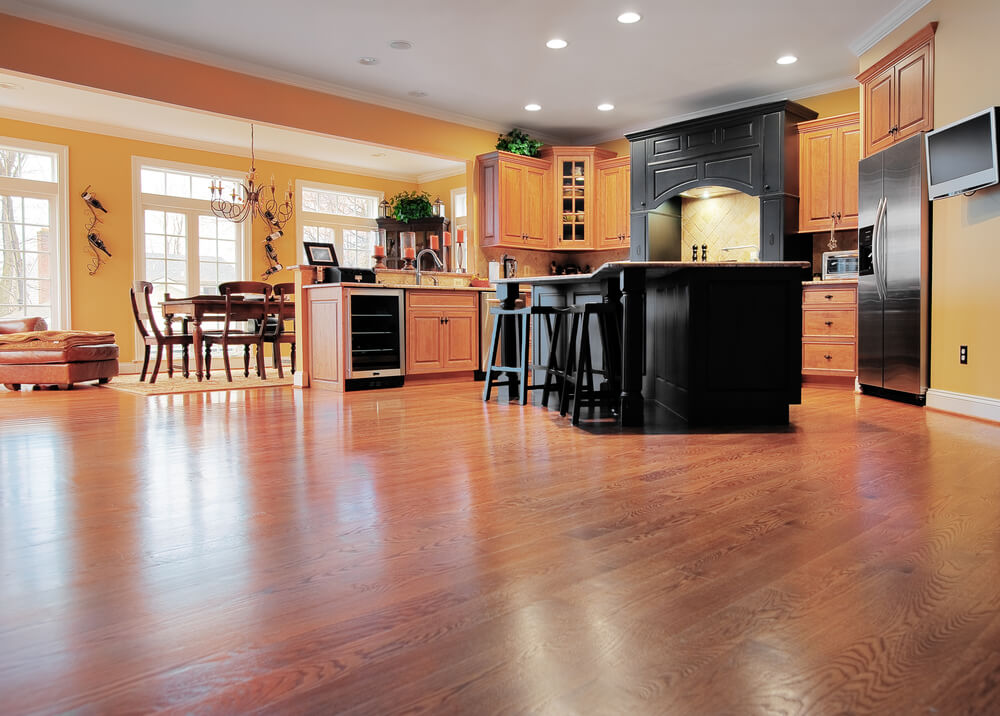
How To Install Laminate Flooring Around Kitchen Cabinets

How to Install Laminate Flooring Around Kitchen Cabinets – Global Cool
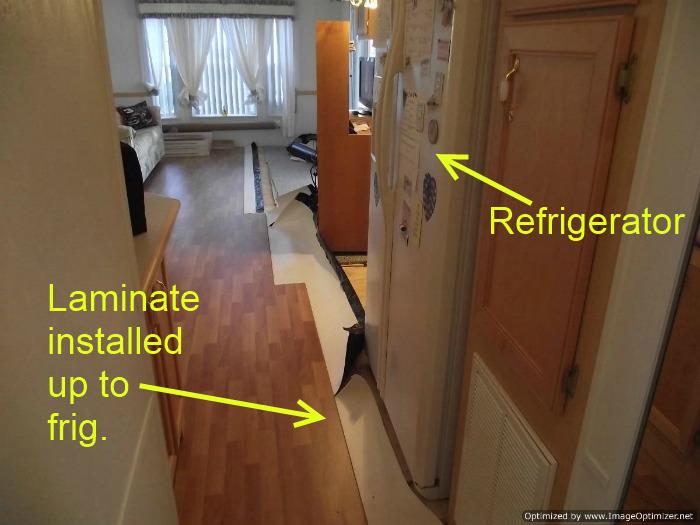
Laminate Flooring Installation Kitchen Under Cabinets / Installing Laminate Flooring under
How To Install Laminate Flooring Around Kitchen Cabinets – Flooring Guide by Cinvex
Laminate Flooring Before Or After Cabinets – The Floors

Flooring or Cabinets: Which to Install First
/Man-removing-floor-GettyImages-200467183-001-b20da3c5e3884f0ea2b171a20a8de124.jpg)
How to Install Laminate Flooring on Concrete in the Kitchen Mryoucandoityourself – YouTube

How To Install Laminate Flooring Under Cabinets www.resnooze.com
How to Install Laminate Flooring
:max_bytes(150000):strip_icc()/how-to-lay-laminate-flooring-1822250-01-0b84ff37785a4f8b94ab8bd30c300bfb.jpg)
How To Install Laminate Flooring Around Kitchen Cabinets – Kitchen Cabinet Ideas
41+ How To Install Laminate Flooring Around Kitchen Cabinets Background – LAMINATE FLOORING
/Installing-Laminate-Stagger-Joints-56a49e453df78cf772834b1f.JPG)
Installing Laminate Around Kitchen Cabinets – cursodeingles-elena

Related Posts:
- Small Kitchen Floor Plan Ideas
- Laminate Flooring In Kitchen
- Black Slate Tile Kitchen Floor
- How To Lay Tile In Kitchen Floor
- Red Kitchen Floor
- Cheap Kitchen Laminate Flooring
- Decorative Kitchen Floor Mats
- Contemporary Kitchen Flooring Ideas
- Kitchen Ceramic Tile Floor
- Quarry Tile Kitchen Floor
Installing laminate flooring around kitchen cabinets is not a difficult task, and it can be done in a few simple steps. The process of installing laminate flooring around kitchen cabinets is the same as it is for any other type of flooring, but there are a few extra considerations to take into account when working with laminate material. With the right tools and materials, you’ll be able to have your kitchen floor looking beautiful and stylish in no time.
## Gather Your Tools and Materials
Before you begin installing your laminate flooring around kitchen cabinets, you should make sure that you have all of the necessary tools and materials. To install laminate flooring around kitchen cabinets, you will need a saw, hammer, screwdriver, level, tape measure, underlayment, laminate planks, glue, and trim pieces. Depending on the type of flooring you are installing, you may also need an adhesive or other specialty materials.
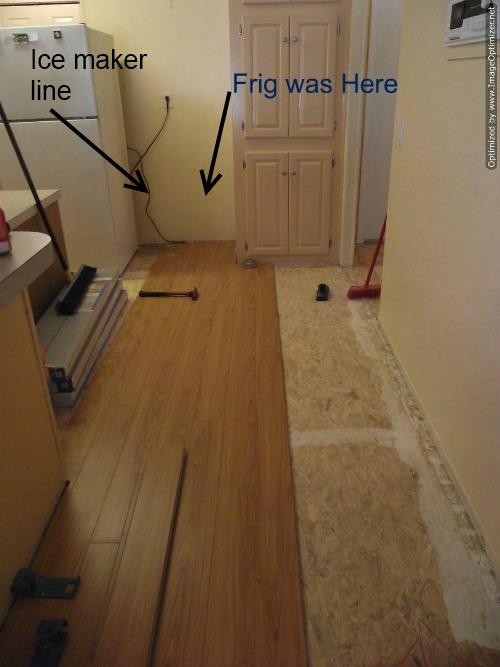
## Prepare the Area
The first step in installing laminate flooring around kitchen cabinets is to prepare the area. This includes removing all furniture and appliances from the room and cleaning the subfloor. You will also want to check for any existing damage to the subfloor and make any necessary repairs before proceeding.
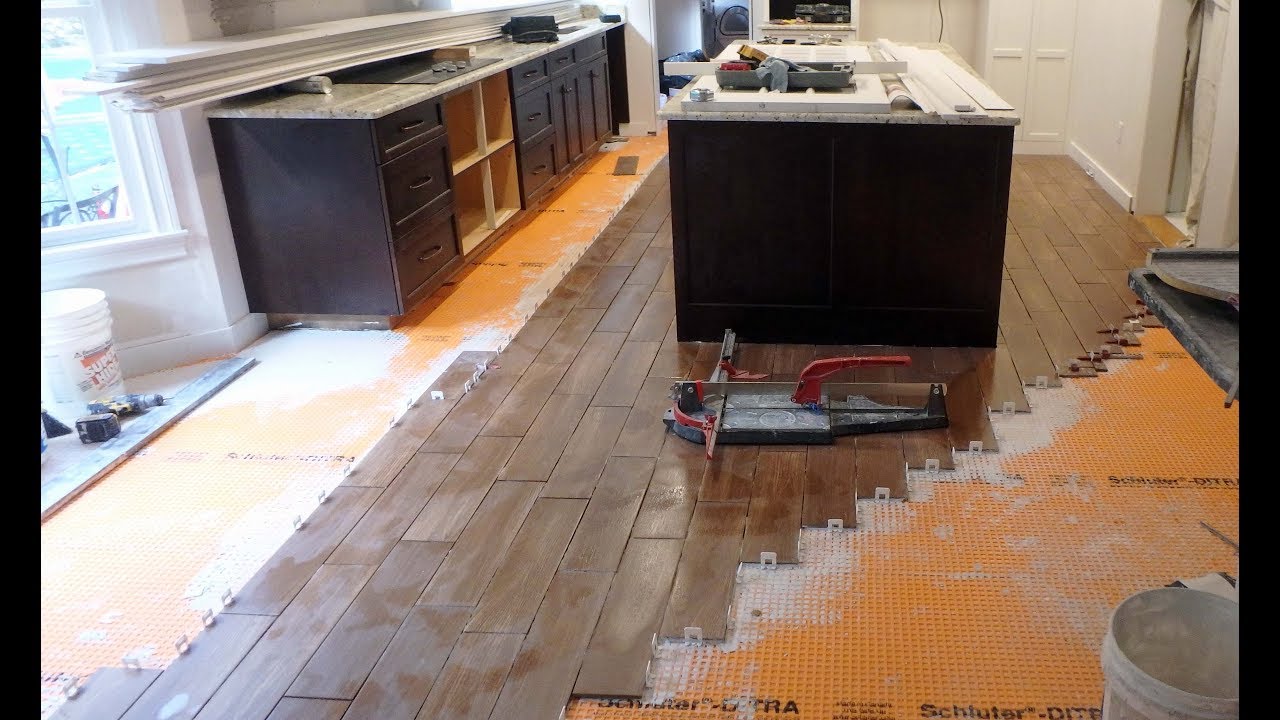
## Install the Underlayment
Once the area has been prepared, it is time to install the underlayment. This is an important step in the installation process as it helps protect your laminate flooring from moisture and provides a sound-proof barrier against noise. When installing the underlayment, make sure that it is properly sealed against the walls and that there are no gaps or air pockets between it and the subfloor.
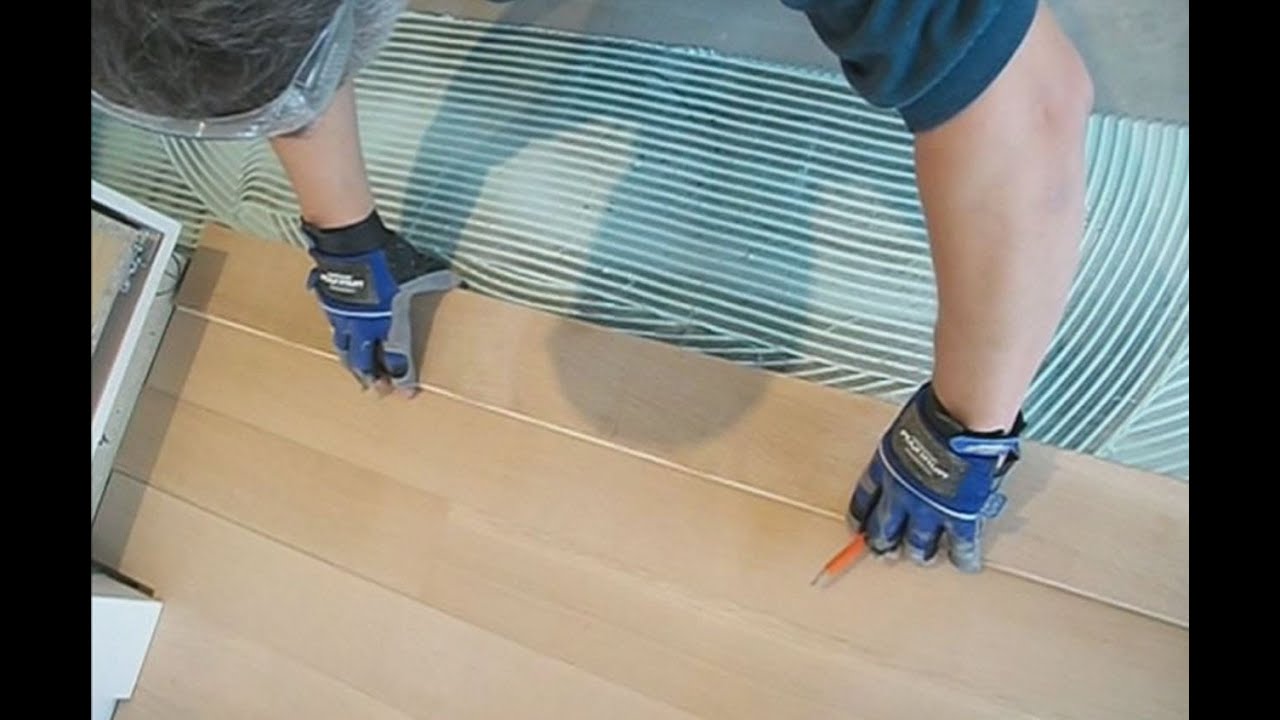
## Lay Out the Laminate Planks
Now that you have installed the underlayment, it’s time to lay out your laminate planks. Start by measuring out your layout and cutting the planks accordingly. When laying out your planks, remember to leave a gap between each plank for expansion purposes. Once your planks are laid out correctly, you can begin gluing them down to the subfloor.
## Install Trim Pieces
Once your laminate planks are glued down, it’s time to install trim pieces around any obstacles such as kitchen cabinets or appliances. Trim pieces help give your floor a professional look by covering up any gaps between planks or edges of walls and cabinets. You can purchase pre-made trim pieces or cut your own using a saw or router.
## Final Touches
The final step in installing laminate flooring around kitchen cabinets is to add any finishing touches such as transitions or baseboards. These pieces help tie everything together and give your finished project a polished look. Once these pieces are installed, your new laminate floor will be ready for use!
Installing laminate flooring around kitchen cabinets can be a relatively simple task if you have the right tools and materials on hand. By following these steps and taking extra care when preparing and laying out your planks, you can ensure that your new laminate floor looks great for years to come!